Whiteout Survival Guide | Beginner‘s Guide
Living through the brutal and constant cold in Whiteout Survival can be really tough, especially if you’re new to the game. This is mainly because, while the game has a helpful tutorial to introduce you to the game world, it also puts a lot of pressure on you with the frequent snowstorms. These storms can cause a lot of damage and losses if you’re not ready for them. Fortunately, in this beginner’s guide for Whiteout Survival, we’ll cover the most essential mechanics, so you can start your journey on the right foot.

Dowaload & Play Whiteout Survival on PC with NoxPlayer
Furnace—The Most Important For Your Settlement
It’s difficult to list a more important element for your settlement than your Furnace. This building is arguably the most important part of your town, mainly because it’s what’s keeping your survivors alive, even through the harshest snowstorms. Sure, while lack of food will definitely spell disaster for your small civilization, what good would it do to have your storehouses packed with food if the lack of warmth is going to make them ill or even freeze them to death.
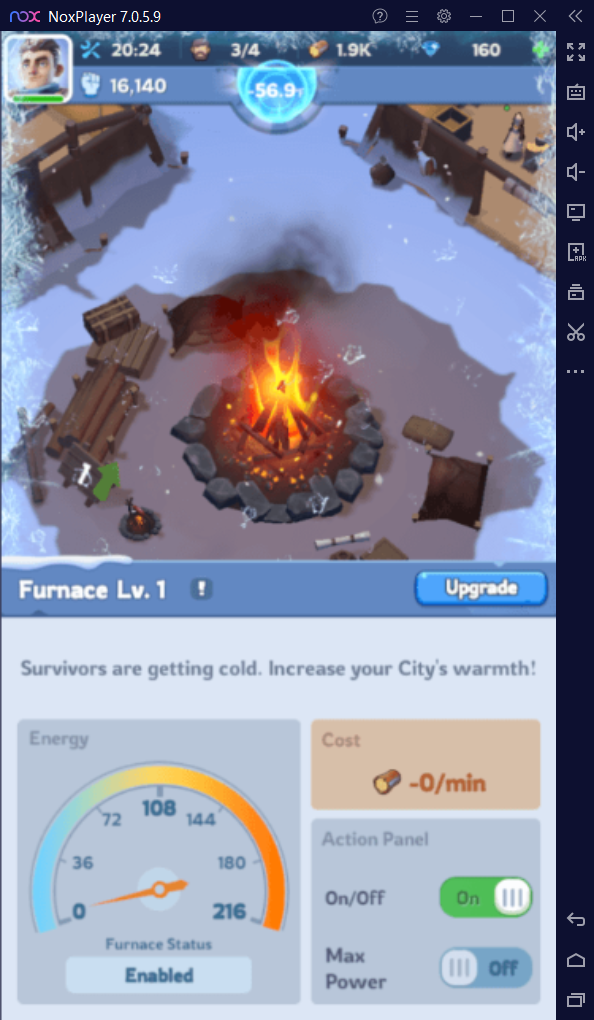
One of the leading causes of death and failure in Whiteout Survival is having a weak furnace—while this will pretty much keep you warm under normal circumstances, it will not be powerful enough to heat up your town at night, and much less during a snowstorm, which is when the cold is cranked up to 11.
Every upgrade and enhancement you make to your town should, in a way, work towards upgrading your Furnace. Not only do you need the warmth to prevent disease and survive, but it’s also the main way to expand your town and unlock new features. This is because, as your Furnace burns hotter, it covers more territory, allowing you to explore further into the frozen wastes, and gain access to more buildings. For instance, upgrading your Furnace to level 7 will give you access to the Lighthouse, which is the building through which you can launch Exploration missions.
The Basic Needs of Survivors
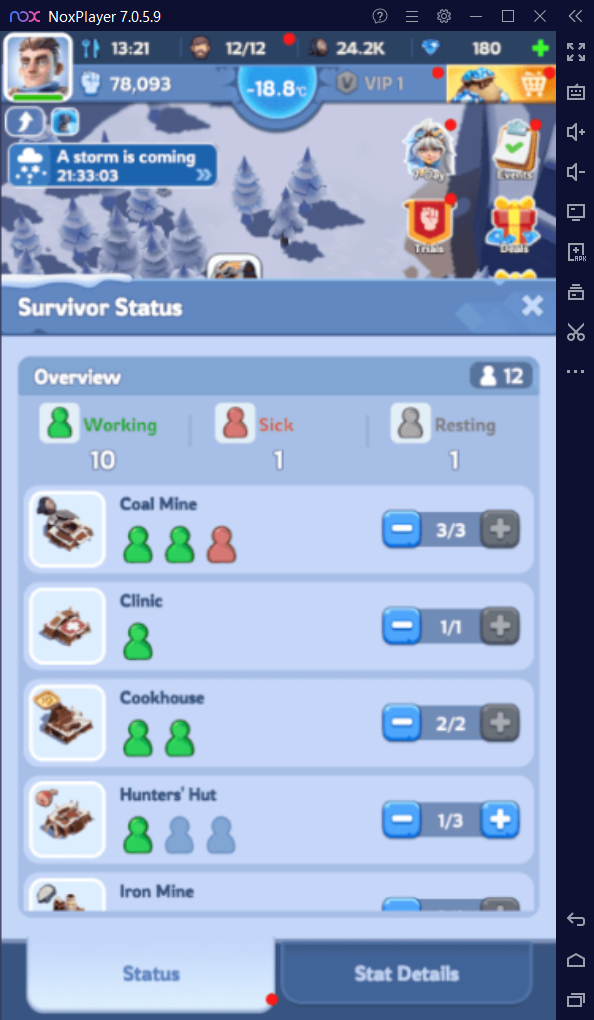
While the Furnace is very important for your town’s development, your actual workers, the Survivors, are the ones doing all the hard work. They are the key to surviving in Whiteout Survival.
Survivors are the workers you can assign to different buildings to produce resources. A building won’t produce anything unless you have Survivors assigned to it. The Survivors’ productivity depends a lot on whether their basic needs are met.
Dowaload & Play Whiteout Survival on PC with NoxPlayer
To get Survivors, you need to build and upgrade Shelters, where they will live when not working. The more Shelters you have, the more new Survivors will join your town when the “New Survivors” notification appears.
The basic needs of your Survivors are Health and Happiness. Health covers things like warmth, food, and sleep. As long as you have an upgraded Furnace, Cookhouse, and Shelters, you can keep their Health high.
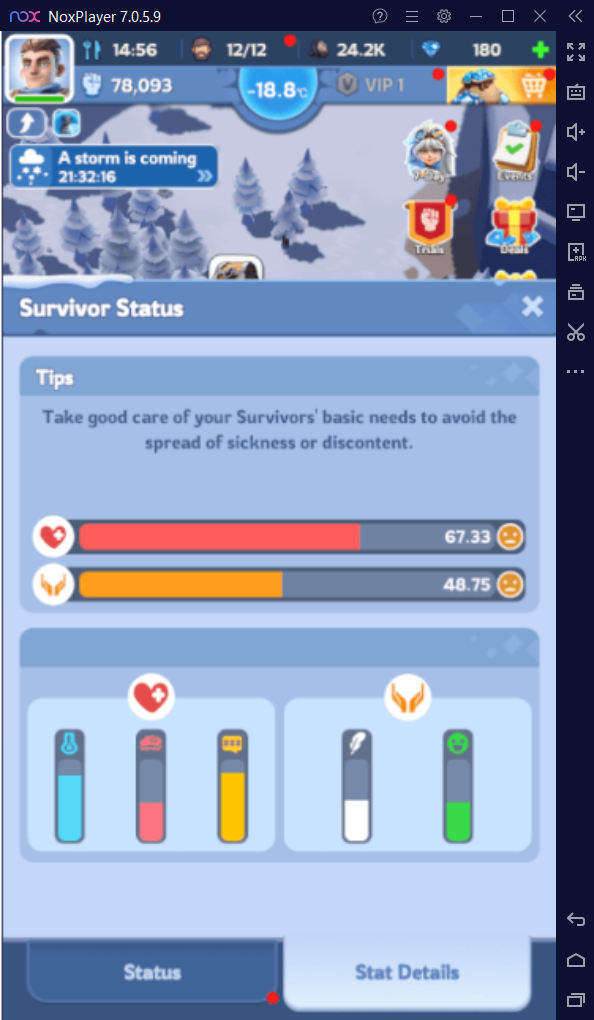
Happiness is a bit more complex, as it’s about extra comforts that make your Survivors’ lives better, like amenities in their Shelters. Happy Survivors will be more productive.
Keeping your Survivors’ basic needs met is the most important thing, as failing to do so can lead to illness and death. But keeping them happy is also important for boosting their productivity.
Buildings and Upgrades
Building in Whiteout Survival is a bit different from typical base-building games. Instead of placing buildings anywhere, you click on predetermined slots in your settlement to build the structures assigned to those spots. This makes building simpler, but limits your creative freedom in designing your town layout.
Each building in your settlement has a specific purpose – like producing food, generating resources, or heating your town. Constructing and upgrading these buildings is crucial for growing your settlement.
Dowaload & Play Whiteout Survival on PC with NoxPlayer
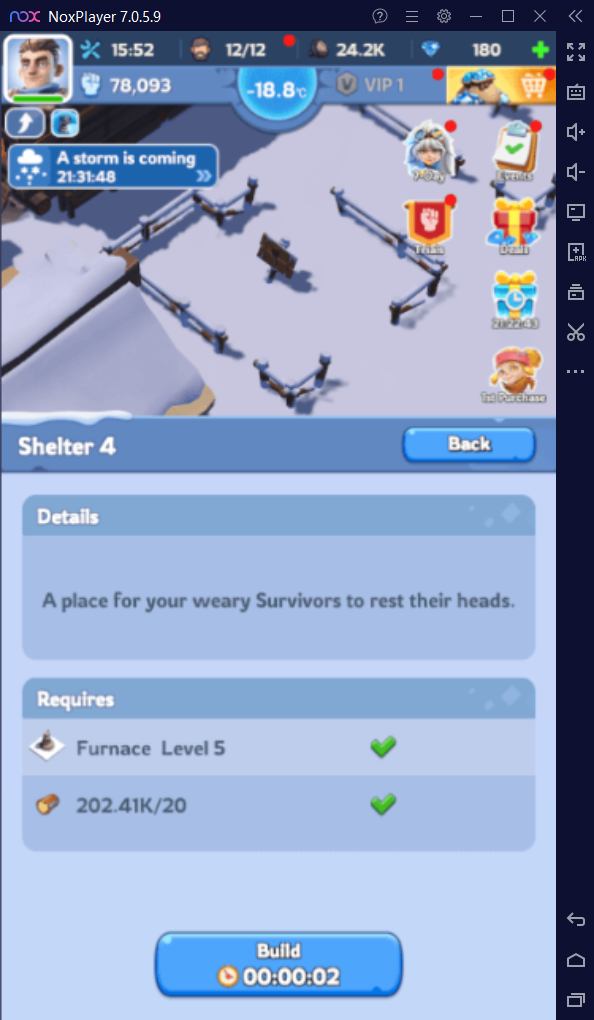
To upgrade a building, you just click on it and you’ll see a list of sub-facilities and upgrades you can construct in the lower panel. Once you’ve built enough sub-facilities to fill the progress bar to 100%, you can click the “upgrade” button to level up the building.
This upgrade process works for most structures, with some exceptions like the Furnace, which you can upgrade directly once you’ve met the required conditions, often by upgrading other buildings to certain levels first.
So while your building placement is more limited, the actual process of constructing and upgrading your facilities is fairly straightforward in Whiteout Survival.
Exploration and Expeditions
The whole point of upgrading your buildings and facilities in Whiteout Survival is so you can engage in more challenging content, like combat-focused Explorations and resource-gathering Expeditions.
Explorations are stage-based missions where your hero characters fight enemies in real-time. The battles are mostly automatic, but you can choose when to use your heroes’ special abilities. Completing Explorations earns you valuable rewards.

Expeditions are a different type of content that don’t always involve direct combat. Instead, you can explore the map, search for resources, hunt animals, complete intel missions, and even attack other players. However, you need to upgrade your Furnace to level 7 first to unlock the Expedition feature.

Dowaload & Play Whiteout Survival on PC with NoxPlayer
Both Explorations and Expeditions provide useful rewards, but Explorations may be too difficult until you’ve upgraded your heroes enough. Expeditions let you boost your resource production or steal from other players at any time.
Engaging in this exploration and combat content is key to progressing further in Whiteout Survival, so make sure to take advantage of these features once you’ve built up your settlement.